Easy No Bake Cheesecake Pops
Looking for an easy but impressive dessert to make? Maybe for a get-together or party? Be sure to check out these cheesecake pops!
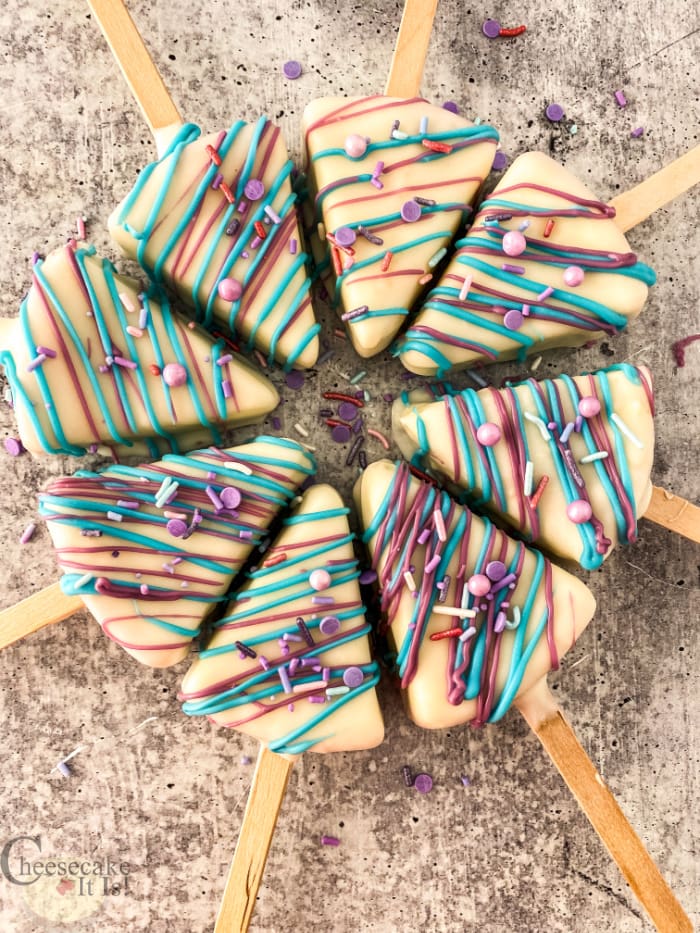
These are no bake cheesecake pops as we are using pre-made grocery store cheesecake to make this super simple recipe.
However, if you don’t want to use pre-made, here are a few of our own cheesecake recipes that would work well for these. Just remember to freeze the cheesecake first.
- Chocolate Chip Cheesecake Recipe – In The Oven
- Smoked Cheesecake With Caramel And Sea Salt (Cooked In A Smoker)
- Instant Pot Caramel Apple Cheesecake
- Banana Split Cheesecake In The Instant Pot
- Earl Grey Cheesecake
- Pumpkin Swirl Mini Cheesecake
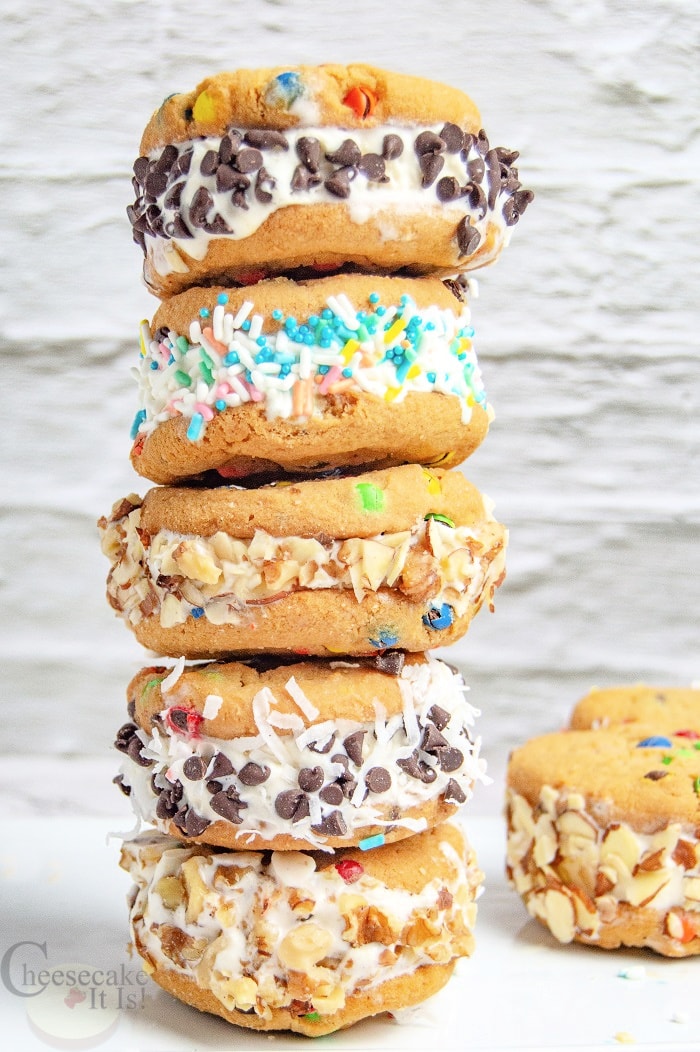
These would be a great idea to serve right from the freezer on a hot summer day! You may also want to check out our Super Easy Cheesecake Ice Cream Cookie Sandwich!
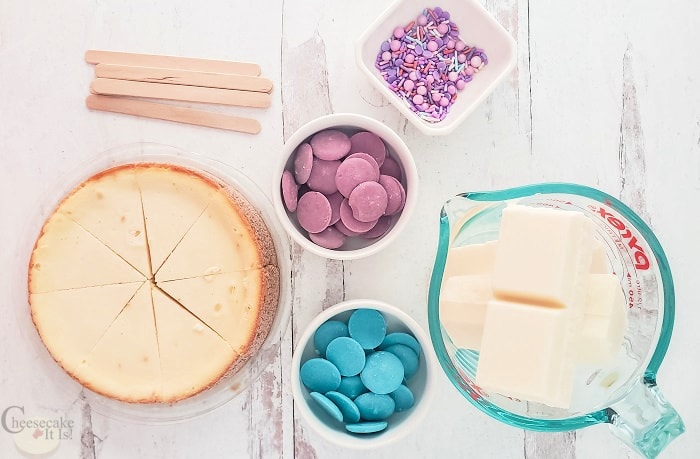
Ingredients Needed:
- Frozen Cheesecake (cut into triangles for this one but could do other shapes)
- Sprinkles or Topping of choice (could use large colored sugar too)
- Vanilla or Chocolate Almond bark
- Candy melts
Recipe Yields: 8 slices (or whatever size your cheesecake is)
Prep Time: 10 mins
Rest Time: 15 mins
Total Time: 25 mins
How To Make No Bake Cheesecake Pops:
First, you want to make sure you are starting with a sliced and frozen cheesecake. This WILL NOT work with a cheesecake that is not frozen.
Line a cookie or baking sheet with a silicone mat or parchment paper and set it aside.
Melt the almond bark in the microwave in a microwave-safe bowl or glass measuring cup.
Dip one end of the stick (popsicle stick, lollipop stick, or cake pop stick) into the melted chocolate. Then push it into the wide end of the frozen cheesecake slice.
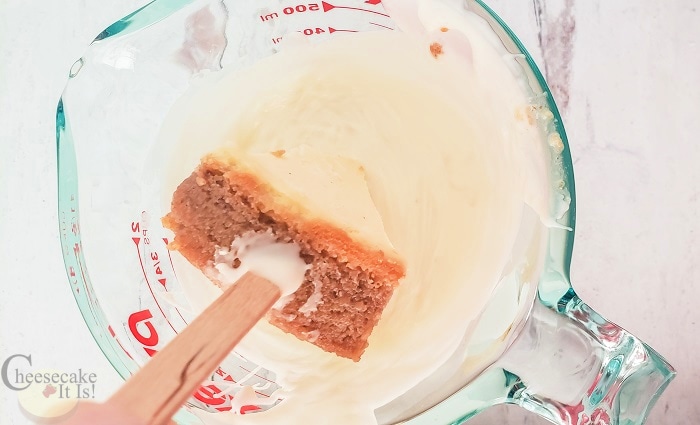
After you have the stick in the cheesecake, quickly dip the slice into the melted chocolate. Carefully give it a little shake to get off any excess chocolate.
Place the coated cheesecake pops onto a silicone or parchment-lined cookie sheet. Allow the chocolate fully harden for about 10-15 minutes.
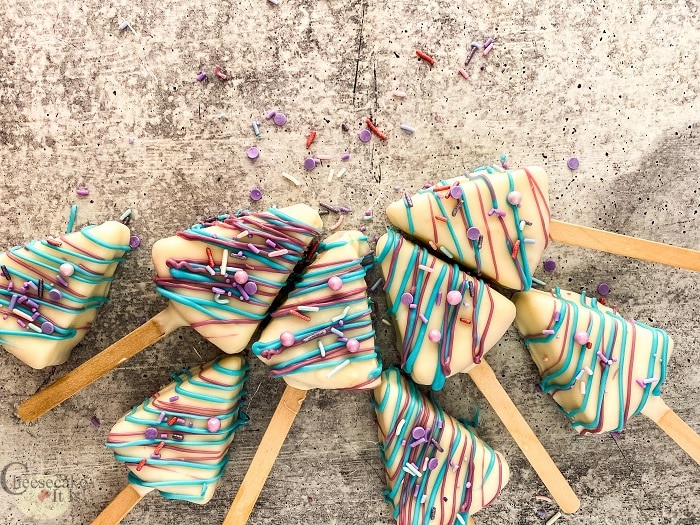
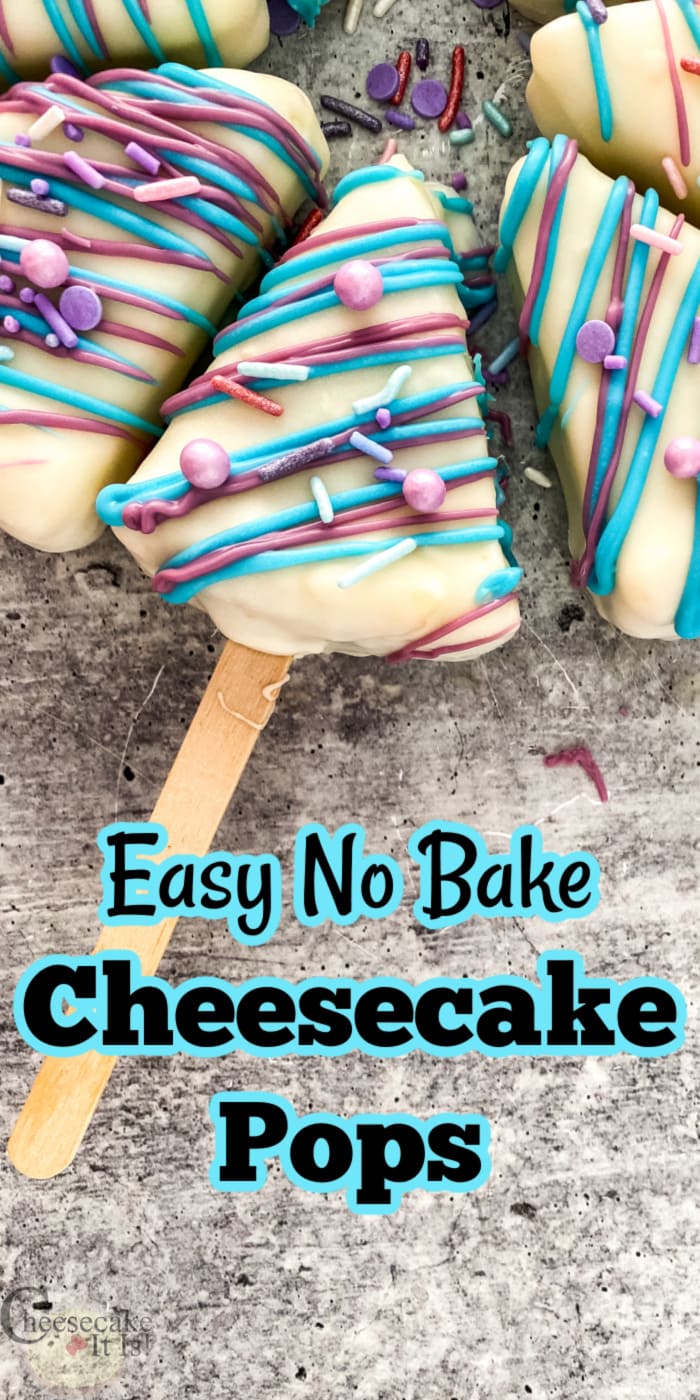
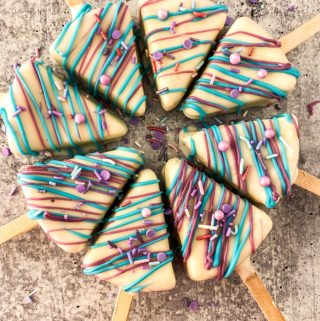
When the chocolate is fully hardened on the cheesecake pops, we need to dress them up. Put some colored candy melts into the plastic piping bags. Warm them in the microwave for 30-second intervals until they are fully melted.
Cut the very tip of the bag off. Then drizzle the chocolate over the coated cheesecake slices. Add a few different colors if you like.
Then you will want to add sprinkles or toppings immediately. This needs to be down when the candy melts are still melted as it will act as glue. This is a step you can let the kids help with as I am sure they will have a lot of fun doing it!
After these are made, they can be stored in the fridge or freezer. They will last in the fridge for up to 3 days or freezer for up to 7-10 days. You can also wrap each pop in plastic wrap to make it easy to grab one at a time.
Things You MUST Know When Making These Pops:
You must start with a sliced frozen cheesecake.
You will need to work quickly. That is because you want the cheesecake to stay firm while you are working. You also don’t want your chocolate to harden while you are working with it. If you don’t think you can work fast enough, just remove a slice or two of cheesecake from the freezer to work on at a time.
While the bark/chocolate can be melted in the microwave, I do find it a little easier to work with a candy melting pot. It helps keep it from cooling off/ hardening while you are working.
Change up the colors and sprinkles to fit the party or special occasions you need them for. These would be great for a baby shower, graduation party, or birthday parties just to give you a few ideas. These are sure to be a big hit with any cheesecake lovers!
While you may think you could use normal chocolate chips or white chocolate chips to coat the cheesecake slices, they do not harden as well as the bark. If you use those the chocolate coating on the cheesecake will melt much faster and be a little softer.
If making your own cheesecake, these do not work as well with no bake cheesecake recipes.
Easy No Bake Cheesecake Pops
Ingredients
- Frozen Cheesecake
- Sprinkles
- Almond bark
- Candy melts
Instructions
- First, you want to make sure you are starting with a sliced and frozen cheesecake. This WILL NOT work with a cheesecake that is not frozen.
- Line a cookie or baking sheet with a silicone mat or parchment paper and set it aside.
- Melt the almond bark in the microwave in a microwave-safe bowl or glass measuring cup.
- Dip one end of the stick into the melted chocolate. Then push it into the wide end of the frozen cheesecake slice.
- After you have the stick in the cheesecake, quickly dip the slice into the melted chocolate. Carefully give it a little shake to get off any excess chocolate.
- Place the coated cheesecake pops onto a silicone or parchment-lined cookie sheet. Allow the chocolate fully harden for about 10-15 minutes.
- Put some colored candy melts into the plastic piping bags. Warm them in the microwave for 30-second intervals until they are fully melted.
- Cut the very tip of the bag off. Then drizzle the chocolate over the coated cheesecake slices. Add a few different colors if you like.
- Then you will want to add sprinkles or toppings immediately. This needs to be down when the candy melts are still melted as it will act as glue.
Notes
Know that estimated nutrition facts are just a guideline and will vary depending on any variation you make or brand you use from what we have listed.